As a math teacher, I give a lot of problems to my students that are equations. This provides a great opportunity for students to work together to solve a problem. Put one student on the left side of the problem and another student on the right side of the problem. Then they can only do things on their "side" of the problem. It was amazing. Basically, it forced my students to work in tandem and at the same speed. Even better was the fact that they had to talk the math out. So one person added something to her side of the equation. That meant that their partner had to add something to their side as well. They would each discuss what had to be done next. If one student tried to do something to one side, the other person would not do anything to their side until things were explained. It was a magical moment. So here is how I designed it.
We were doing 2 step equations in Introduction to Algebra
1. Have the students working in pairs. Have them move their desks next to each other.
2. Have one sheet of paper per pair of students.
3. Tell the student in the left desk that they are only allowed to write on the left side of the equation. Also, the person in the right desk are only allowed to write on the right side of the equation.
4. Give a question to your students that is an equation.
5. Watch your students work together to solve the problem.
6. Monitor your students to see when they might be getting done.
7. Pick a student at random to come to the board with their partner and explain the problem. The pair should bring up the paper they were working on to guide them.
8. The pair should "JUSTIFY" what they do. I like to have both students alternate talking.
Have you seen the new game called "Minute to Win It"? It is a great game. In the show there is something called the "Breakfast Scramble" where a cereal box is cut up in to 20 rectangular equal size pieces. Then they have two people working together to put the pieces back together again. Of course they have to do it in a Minute. Here is a video of the rules. While I was watching the show I thought of using my new DUAL TOUCH 800 Series SMARTBOARD. Perfect for our DUAL TOUCH SMARTBoard! Here is what I did in class. 1. I found a picture that would be easy to put back together. 2. Then I cut the problem up into 12 square pieces. (I used the screen capture tool by placing a light gray dotted grid over the picture) We did a podcast on this very topic with instructions. All you have to do is go to podcast number 81 at http://www.teachingwithsmartboard.com/ 3. I deleted the picture and scattered the 12 pieces around the page. 4. I put a timer in the corner. (optional) 5. Now I chose two students to come up to the board and UN-SCRAMBLE the picture. This was really engaging and it was fun to see people working together. Here are my students working on the new DUAL TOUCH 800 Series SMARTBoard. Today I made a problem in my Introduction to Algebra class and then cut it up into 12 pieces. I asked two students to come up and put the problem together and then solve it. The rest of the class has to wait until the problem is revealed before they could start on the rest of the problem. Check out the video below. It turned out to be a very engaging activity. I'm excited to learn more tricks with the board. This is my third day with the new board. I anticipate a lot of new FUN. Do you have a 800 Series SMARTBoard? Let me know. How are you using the dual touch feature? All the Best, Dave
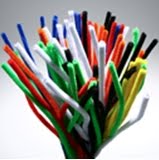
I keep trying to find activities for my kinesthetic learners. This activity helped students to actually "DO" the math. There were some definite ahah moments for some of my students. I took out some pipe cleaners and handed them out to my pre-calculus class. Pipe cleaners are great for teaching transformations of graphs. Students had to physically move the graph up, down, left or right. We predicted shifts and we found multiple answers to graphs. See below.
1. Either have your student make their own scale on a piece of paper or hand out a scale for your students. 2. With the paper scale in hand, ask them to make a certain graph. I asked my students to make a y = sin x graph. They proceeded to bend the pipe cleaner into a sign wave. The graph could be a parabola, or cubic or even a line. 3. Then I asked them to shift the graph up. Explain what the new equation would be. For my class I then had them shift the graph to the left until it turned out to be the same graph as the original. They shifted it over one period. we found our new equation to be y = sin(x-2π) 4. Have them shift it left or right and predict the new equation 5. Have them move the pipe cleaner into a certain location and then ask for an equation.
6. Ask them to reflect the pipe cleaner over an axis or the origin.
Here are some of the things we graphed and explored in my pre-calculus class.
Find 5 other graphs that are equivalent to y = sin(x+2π)including at least 1 cosine graph. Find 3 other graphs including at least 2 sine graphs equivalent to y = cos(x)
I tried to reach my kinesthetic learners with this activity. Basically, the students are laying down on the floor and making right triangles. Then there is some right triangle trigonometry going on. I think it reinforced the SOHCAHTOA concept in a new way.
Here are my instructions:
1. Your group of four will make a single video of some Trig problems. 2. Each person will take a turn taking the video. (with a FLIP Video Camera) 3. The other three people will form a right triangle on the floor by laying down. Make sure you make a CLEAR right angle. When you are laying down, make sure you are in a head to feet order. 4. The person running the flip video will explain where the right angle is, and then call out a trig function and an angle like SIN of ALEX. Once the trig function is named, the person who is the Opposite side will wave and say "opposite". Then the person who is the hypotenuse will wave and say "hypotenuse". 5. Change the person who is taking the video and form another triangle with the remaining people. 6. Repeat the process for each person who is using the flip.
We watched some of the videos after they finished. I think this just further reinforced the concept. You will get the idea with the video below. This is just a clip of a 2 minute video.
What do you think should be in the list of the 13 most important Virtues for TEACHERS? It was extremely difficult for me to choose only 13. I'm sure that yours would differ. It is a good exercise for all teachers. Try it yourself and leave your 13 virtues in a comment to this post. I got the idea from Ben Franklin, who came up with 13 Virtues that we all should live by. They are at the bottom of the post.
Here are some words that were close but didn't make my list. Attitude, Caring, Compassion, Consistency, Determination, Dignity, Facilitate, Fairness, Forgiveness, Hopeful, Humility, Instruction, Intelligence, Passionate, Professionalism, Organization, Questioning, and Trust.
Ben Franklin's 13 Virtues 1.Temperance. Eat not to dullness; drink not to elevation. 2.Silence. Speak not but what may benefit others or yourself; avoid trifling conversation. 3.Order. Let all your things have their places; let each part of your business have its time. 4.Resolution. Resolve to perform what you ought; perform without fail what you resolve. 5.Frugality. Make no expense but to do good to others or yourself; i.e., waste nothing. 6.Industry. Lose no time; be always employ'd in something useful; cut off all unnecessary actions. 7.Sincerity. Use no hurtful deceit; think innocently and justly, and, if you speak, speak accordingly. 8.Justice. Wrong none by doing injuries, or omitting the benefits that are your duty. 9.Moderation. Avoid extremes; forbear resenting injuries so much as you think they deserve. 10.Cleanliness. Tolerate no uncleanliness in body, cloaths, or habitation. 11.Tranquillity. Be not disturbed at trifles, or at accidents common or unavoidable. 12.Chastity. Rarely use venery but for health or offspring, never to dullness, weakness, or the injury of your own or another's peace or reputation. 13.Humility. Imitate Jesus and Socrates.
Why don't you try to have your students use flip videos to videotape each other doing math problems and then post them on your website or view them in class? It is a great way to have students really know their problem. This is an assignment that I have not graded. The students want to do well for their classmates. They don't want to steer their classmates in the wrong direction. Here are my 3 reasons why FLIPS work in the class.
1. Accountability to know the material
2. Fun for Students.
3. Depth of Understanding with the Topic
I have posted before on the use of Flip Videos in the classroom. Click here to go to that post. Now I have some solid rules for the use of Flip Videos in the class.
FLIP VIDEO STUFF
Directions
·Each pair of students will be given a problem.
·Figure out the solution to the problem on paper and check to make sure it is correct. Check your solution with the answer key.
·Plan out a 2 minute or less presentation.See Presentation below.
·Write out the section/problem number(s) on your whiteboard or desk.
·Write out the question with any key information on your whiteboard or desk.
·Write out part of the problem’s solution on your whiteboard or desk.
·Remember each person will do some explaining in the video.
·Make sure that your writing is big enough to see through the video.
·Get a “FLIP” and read the instructions about “The FLIP”.See below.
·Once you are finished with your presentation, return the “FLIP” and begin working on the rest of the homework assignment.Make sure you put a note-card with your names and section/problem into the black bag of the FLIP.
Presentation:2 minutes or less (redo your video if it is over 2 minutes)
1.Introduce yourselves:first names only.
2.Read the section/problem number(s) from the writing on your whiteboard or desk.
3.Read the question and any key information from the writing on your whiteboard or desk.
4.Explain the solution that you have written out on your whiteboard or desk so far.
5.Finish the problem by actually writing in front of the “flip” while explaining the solution.
6.Thank the audience for their time and to have a good day.
The FLIP
·Put a note-card or piece of paper with all the people who contributed to this video as well as the section/problem that was done in the bag of the FLIP.
·Delete all videos on your flip except your finished version including any previous videos.
·Do not video tape your partners face.These videos will not be posted.
·Do a practice video with your partner to start.Each of you should take turns holding and filming with the “flip”.Delete this video.
·The camera will not be able to pick up the calculator screen so any graphs will need to be written out on your whiteboard or desk.
1. Give out 6-8 questions that are in the medium to difficult range that will be due the next day.
2. Assign a problem to each pair of students. Have them work out the problem before you hand out the Flip Video camera. Make sure they check their answers with some type of key before moving on to the videotaping step.
3. Each student will need to write out the question on a large piece of paper, a personal whiteboard or in our case, on their desk with a whiteboard marker. Have the students start solving the problem, but not completely finish it. This will be done while they are videotaping the explanation.
4. Give out the Flips and make sure the students know the rules like only 2 minutes, start with introductions, no faces, both people must talk, and so on.
5. Give them time to work.
6. When the videos come back just load them onto your computer. This is pretty easy with the flip video software.
7. The students will need to work on the other problems from the original problem set. If you are going to post the videos, they will be able to see them that night online. I use http://www.youtube.com/ to upload my videos. It is easy and free.
I have a couple of videos for you to see the students working in action.
I found a great timer to use in your class. You must use it online. It is almost full screen. It can be adjusted to count up or down. You can change the end noise to be different sounds. You can adjust the size and color as well. It is perfect for any standardized testing situation. I think it is perfect for a class to use in group work time.