1. Accountability to know the material
2. Fun for Students.
3. Depth of Understanding with the Topic
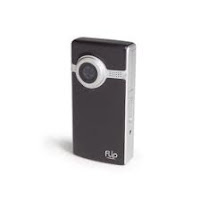
I have posted before on the use of Flip Videos in the classroom. Click here to go to that post. Now I have some solid rules for the use of Flip Videos in the class.
Directions
· Each pair of students will be given a problem.
· Figure out the solution to the problem on paper and check to make sure it is correct. Check your solution with the answer key.
· Plan out a 2 minute or less presentation. See Presentation below.
· Write out the section/problem number(s) on your whiteboard or desk.
· Write out the question with any key information on your whiteboard or desk.
· Write out part of the problem’s solution on your whiteboard or desk.
· Remember each person will do some explaining in the video.
· Make sure that your writing is big enough to see through the video.
· Get a “FLIP” and read the instructions about “The FLIP”. See below.
· Once you are finished with your presentation, return the “FLIP” and begin working on the rest of the homework assignment. Make sure you put a note-card with your names and section/problem into the black bag of the FLIP.
Presentation: 2 minutes or less (redo your video if it is over 2 minutes)
1. Introduce yourselves: first names only.
2. Read the section/problem number(s) from the writing on your whiteboard or desk.
3. Read the question and any key information from the writing on your whiteboard or desk.
4. Explain the solution that you have written out on your whiteboard or desk so far.
5. Finish the problem by actually writing in front of the “flip” while explaining the solution.
6. Thank the audience for their time and to have a good day.
The FLIP
· Put a note-card or piece of paper with all the people who contributed to this video as well as the section/problem that was done in the bag of the FLIP.
· Delete all videos on your flip except your finished version including any previous videos.
· Do not video tape your partners face. These videos will not be posted.
· Do a practice video with your partner to start. Each of you should take turns holding and filming with the “flip”. Delete this video.
· The camera will not be able to pick up the calculator screen so any graphs will need to be written out on your whiteboard or desk.
· Here is an example of a “FLIP” video.
Click here to get the document in WORD from my google doc's file.
Here is the structure of this activity
1. Give out 6-8 questions that are in the medium to difficult range that will be due the next day.
2. Assign a problem to each pair of students. Have them work out the problem before you hand out the Flip Video camera. Make sure they check their answers with some type of key before moving on to the videotaping step.
3. Each student will need to write out the question on a large piece of paper, a personal whiteboard or in our case, on their desk with a whiteboard marker. Have the students start solving the problem, but not completely finish it. This will be done while they are videotaping the explanation.
4. Give out the Flips and make sure the students know the rules like only 2 minutes, start with introductions, no faces, both people must talk, and so on.
5. Give them time to work.
6. When the videos come back just load them onto your computer. This is pretty easy with the flip video software.
7. The students will need to work on the other problems from the original problem set. If you are going to post the videos, they will be able to see them that night online. I use http://www.youtube.com/ to upload my videos. It is easy and free.
I have a couple of videos for you to see the students working in action.
All the best,


